
Two years ago, our Norcold 1200LRIM failed. Since it was covered under our extended warranty, we had our choice of replacing the cooling unit with an original Norcold unit or the Amish one. We chose the Amish upgrade since there are no recalls involved with their units. While the Amish cooling unit performed well, IMHO, the Norcold still had its' faults. The one that bothered me the most was the ice maker line. Norcold routes that line up through the cooling unit and it's simply pressed into the feeder tube to the ice maker. A little silicone around this pressed fit and it's supposed to last. Unfortunately ours was prone to failure. When the line slips out of the feeder tube, when the ice maker cycles, the water flows down the back of the fridge and wherever else it wants to go. The 'fix' is to remove the fridge and push the line back into the feeder tube, add some silicone and head on down the road. When it failed for the third time...yes, I'm a slow learner...I'd had enough. Off to the local Home Depot and I purchased a Samsung RF197ACPN. I then contacted a local RV repair shop, Peterson RV in Foley Alabama for assistance. They removed the side front emergency window and slid the Norcold out and the Samsung in, leaving it in my living room. Here's some photos of my installation.
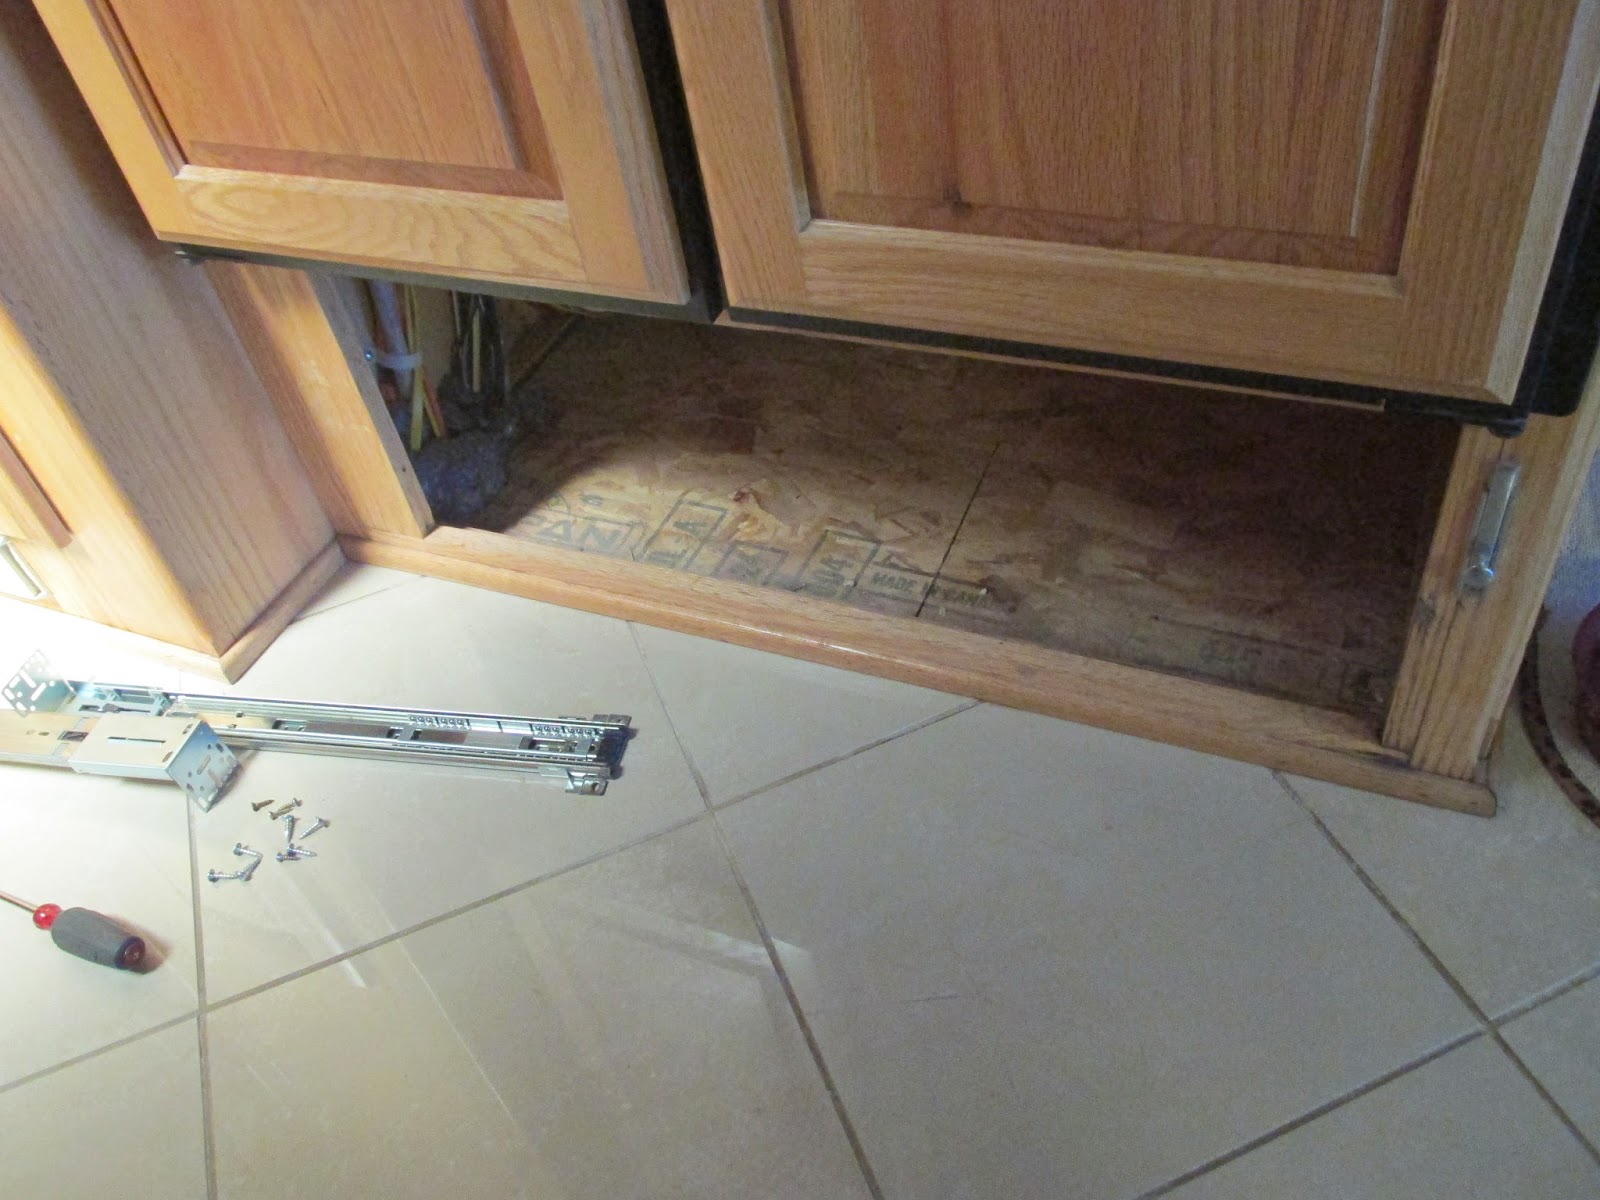
The Samsung is the same width and depth as the Norcold. The height, however is about 6 1/2" taller. Below the Norcold was a drawer. I had to either sacrifice the drawer, remove the top fascia, or a combination of both. Here, the drawer has been removed.

I could have removed the top fascia board and modified it for the extra height of the Samsung. If I modified this board, I could also modify the drawer space underneath and make a smaller drawer. After considerable thought, I decided to simply eliminate the drawer. I felt that if I raised the fridge too much, Debi would have trouble reaching the back of the top shelves of the fridge.

Here's the inside temperature of the Norcold fridge compartment. Holding steady at 40 degrees F.

And the freezer compartment struggling along at a toasty 15 degrees. At least it makes dishing out the ice cream easier....

Once I removed the drawer, I found these bundles of wires. You can see the copper gas line and the blue water lines behind the fridge supports. These wires would be dealt with later.

The Norcold is a 4 door fridge with double doors for the freezer on top and double doors for the fridge compartment on the bottom. As you can see, the fridge is not in the living room slide. My main concern with the Samsung was the door handles. The Norcold handles are flush, while the Samsung's protrude into the room. I was hoping the handles wouldn't interfere with passage through the hallway.

Peterson RV in Foley, Alabama removed the Norcold and put the Samsung in the living room for me. I wanted to do my own install, not only to keep the cost reasonable but to make sure it was installed to my satisfaction. I guess I'm a little OCD on some things.

This is the fridge cavity that must be modified. You can see the gas line on the bottom, and the water line on the top. The electrical outlets are on the wall on the right side of the opening. The floor that the Norcold sat on has been removed and the supporting structure must now be removed as well.

Here you can see the back wall of the fridge cavity. The wires at the top are from the four muffin fan modification I had done to help the Norcold perform better in high humidity locations. I decided to keep these fans in place but now that I have access, I can clean up the wiring etc. I decided to keep the insulation on the left side and remove the insulation on the right. Remember the previous wiring bundles? The insulation will protect and keep those wiring bundles in place. The A/C outlets will be relocated and I decided to leave the rear support brackets in place so the Samsung would have some 'breathing' space in the rear.

The supporting wooden structure has been removed so now it's time for clean up and begin the job of reconstructing the new floor for the fridge. It must be strong enough to support the Samsung's weight of around 450 pounds, loaded.
I also will tackle the relocation of the A/C outlet, the gas and water lines and the bundling of the muffin fan wiring.

Insulation has been removed from the right side and the flooring has been modified to accept the new support structure. I am going to use 1 1/2" 14 gauge Zinc plated slotted angle iron to support the Samsung.

Floor has been cleaned, wiring rerouted and bundled, and the A/C outlets mounted to the back wall. Since I'm doing this install in a campground, I will remove the gas line at a later date when I can support the coach before crawling underneath to disconnect it from the main gas line.

Support base is in place. I used a sheet of 3/4" plywood over the base of 1 1/2" slotted angle iron. I also moved the water line into the corner and secured it with a strap and a bracket. Once the gas line is removed there will be nothing behind the Samsung. Note the A/C outlets behind the rear support brackets. The wiring on top of that brace is for the muffin fans above. They'll most likely never be used, but they are there, 'just in case'...

Simple view of the 3/4" plywood base and the support made of angle iron. Obviously, not enough room for a drawer to be installed, but we are going to live with it for a bit. I may eventually remove this support structure completely and lower the fridge to the floor. That would allow me room above to put in a compartment.

Looking under the floor base at the supporting structure. That's the gas line at the rear as well as the outside dump hose for the Norcold when it defrosted. I left it in place in case I want to use it for something in the future.
I removed the outside access plate and sealed the openings using black Gorilla tape. This will keep out any bugs and the cold/warm outside air.

I made a dolly using the removed flooring from the Norcold and some wheels bought from Home Depot. The 5" wheels raised the fridge up the the exact height I needed to simply slide the Samsung into it's new home. Once in place, I plugged it in and it worked like a charm.

An hour after plugging the Samsung in and I'm a happy camper. Beer is cold and ice cream is hard once again.

I removed the rear inspection plate on the fridge and ran two 2 1/2" lag
bolts through the rear support of the fridge into the 3/4 plywood base.
Once I leveled the fridge, I removed the two front leveling brackets. Using a piece of 1/4" steel, I made two brackets and drilled them to fit in place of the two leveling brackets. Reversing these brackets allowed me to run a 5/16" lag bolt through the front of the plywood base to secure the front of the fridge. It's now secured in the front and the rear so it won't go anywhere while we are in motion.

I was able to find some trim pieces in the Honey Oak at the local Home Depot and finished off the top and both sides of the install.

The final piece has yet to be put in place. The bottom support has to be covered with a piece of oak finished to match our interior. Since I don't have access to a router or the proper tools to finish that off, I'll wait until I can find a local cabinet shop to do it for me. Unfortunately, the removed drawer front is not wide enough to use.
All in all, I'm satisfied with the result. Notice the handles are a non issue. Working alone with only hand tools, it took me a good two days from removal of the Norcold to the finished install of the Samsung. The residential upgrade is one of the best upgrades I've done. It's also one of those head banging episodes where you ask yourself, "Why didn't I do this sooner?"
The cost of the fridge, on sale, at Home Depot was $1100/change. Materials were less than $200. Labor was a good two days but that would be less with proper tools and a workshop. Yes, I would do it again.
Dennis,
ReplyDeleteGreat job in the reefer install!! We had a Whirlpool installed last year and also think it was the best upgrade we have done, You probably did this but make sure you plug the reefer into the proper outlet. On our coach, the Norcold was plugged into a non-inverter outlet and the icemaker plugged into an inverter outlet. You want to make sure you use that inverter outlet for your new RR so it will have power when you are not hooked up to shore power running down the road or dry camping.
Have fun,
Robbie
Thanks for the detailed diary Dennis. This will definitely help me with my install!
ReplyDeleteCraig
This comment has been removed by a blog administrator.
ReplyDeletejust curious, are you plugged into an outlet powered from a pure sine wave converter source?
ReplyDeleteYes, our coach had two receptacles behind the Norcold. One is a normal 120VAC outlet and the other runs off the inverter. The Samsung 197 can operate off either a PSW or a MSW inverter...Dennis
DeleteThat blog was amazing, I am impressed with your thoughts. I got the best information from this site, It’s very useful to all and us. Thanks for sharing this post.
ReplyDeletebest nikai refrigerators dubai
I am Enjoy reading your blog, I've adored viewing the change and all the diligent work you've put into your lovely home. My most loved was seeing the completed consequences of the stencil divider and the carport. I seek you have a beautiful rest after whatever is left
ReplyDeleteBest of luck your future articles.
BUILT-IN REFRIGERATION
INTEGRATED REFRIGERATION
WINE STORAGE
PROFESSIONAL MODELS
I had an RV repair company install my Samsung unit, which is the same as yours. However, I made the mistake of keeping the bottom drawer of my 2006 Monaco Windsor 40 PDQ. The fridge was too high and awkward to use. I now am having it lowered and eliminating the drawer as you did. Another problem is that whenever I make a left turn, all three doors swing open. I have since used several bungy cords to keep the doors closed when in motion, but the doors open slightly then shut as I complete a left turn. Any thoughts or suggestions to securely keep the doors closed?
ReplyDeleteMike, I tried probably every type and style of locking mechanism and almost all failed somehow. However, the best one I found is the Fridge Fixer, see link below. It does have it's issue too but I think it's fixable. The only issue I discovered is the center plastic piece has a tendency to drop a bit which then interferes with closing the freezer. I'll figure out a way to correct that when I'm tired of raising it to close the bottom freezer. Not a big deal as it only does it sometimes...Dennis
Deletehttps://www.recubed.solutions/
Thanks for tips and tricks waiting on my Samsung.Enjoy the trip!
ReplyDeleteVery technical support you delivered to us. We often have to face little or difficulties for your fridge. Without the basic knowledge it's hard to repair it. So, we have to find out the service providers for rearing the ice maker is broken or Water leaking under the fridge or lot more problems. Anyway, this article was very helpful to me. Thanks for sharing.
ReplyDeleteI read all content Its very useful, Sub zero brought in world-class reefer box manufacturing technology from Israel with a focus to provide high quality products at a competitive price designed especially for the Indian market.
ReplyDeleteThanks for sharing this tip.
ReplyDeleteAppliance Repair and Installation Services
I'm finally getting around to writing something because I've found something unique about this post.
ReplyDeleteCriminal Lawyer in Edmonton
This was a fascinating read. Looking forward to more content from you!
ReplyDeleteRental Property Management Edmonton
Property Management Edmonton
Condo Management Edmonton
Tenant Placement Edmonton
This was a fascinating read. Looking forward to more content from you!
ReplyDeleteProperty Management Edmonton
Nice Blog
ReplyDeleteSamsung Fridge Service in Coimbatore